,
Mastering the Perfect Steak with Simple Ingredients
Mastering the Perfect Steak with Simple Ingredients
When it comes to culinary delights, few things can rival the satisfaction of a perfectly cooked steak. The sizzle on the grill, the aroma wafting through the air, and that first tender bite—it’s a sensory experience that many strive to recreate in their own kitchens. But here’s the kicker: mastering the perfect steak doesn’t require a culinary degree or an arsenal of fancy ingredients. In fact, some of the best steaks are made with nothing more than a few simple staples. So, let’s dive deep into the art of steak cooking and discover how to elevate this humble dish to new heights.
The Importance of Quality Ingredients
Before we even think about cooking, let’s talk about the steak itself. The quality of your meat is paramount. It’s like trying to paint a masterpiece on a crumpled piece of paper; no matter how skilled you are, the result will fall short. When shopping for your steak, consider the following:
- Cut of Meat: Ribeye, filet mignon, sirloin—each cut is different, and they all have unique flavor profiles and textures. Ribeye is known for its marbling and flavor, while filet mignon is incredibly tender.
- Grass-fed vs. Grain-fed: Grass-fed beef tends to be leaner and has a more pronounced flavor, while grain-fed beef is typically more marbled and tender.
- Freshness: Always look for meat that’s bright red with little to no discoloration. The smell should be fresh, not off-putting. (Trust me, you don’t want to learn this lesson the hard way.)
I remember my first trip to a butcher shop—an experience akin to stepping into a candy store for a child. The smell of fresh meat, the colorful displays, and the knowledgeable staff made all the difference. Being able to ask questions and get recommendations from someone who knows their cuts is invaluable. If you can, seek out a local butcher; they can provide insights that supermarket meat sections may lack.
Essential Ingredients for a Simple Yet Perfect Steak
Now that we’ve covered the steak itself, let’s move on to the other essentials. Here’s a short list of what you’ll need—most of which you probably already have in your pantry:
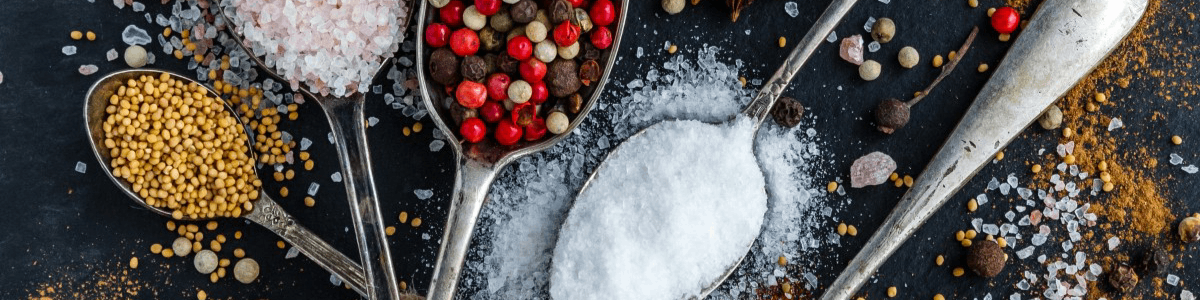
- Salt: Preferably kosher salt or sea salt. This is crucial for flavoring your steak.
- Pepper: Freshly cracked black pepper is best—don’t even think about using pre-ground stuff!
- Oil: A high smoke point oil, like canola or grapeseed, is perfect for searing.
- Butter: This is optional, but a knob of butter can elevate your steak’s richness.
- Fresh Herbs: Rosemary or thyme can add a lovely aromatic touch if you’re feeling fancy.
It’s remarkable how just these few ingredients can transform a piece of meat into a culinary masterpiece. I once attended a barbecue where a friend proudly proclaimed he could “season a steak with just salt and pepper.” I raised an eyebrow (as one does), but he proved me wrong that day. The steak was so flavorful and well-cooked that I found myself taking notes. Sometimes, less truly is more.
Preparation: The Key to Flavor
Before cooking, it’s vital to prepare your steak properly. This step is often overlooked but can make or break your final dish. First, let the steak come to room temperature—30 to 60 minutes on the counter before cooking is ideal. This helps ensure even cooking throughout.
Next, season the steak generously with salt and pepper. Don’t be shy—this is where the flavor begins. As you sprinkle the salt, remember that it will draw moisture out of the meat, so a good amount will create a lovely crust when cooked. (In my early cooking days, I often under-seasoned my steaks, thinking I was being cautious. Spoiler alert: I wasn’t.)
The Cooking Method: Grill, Pan, or Broil?
Ah, the age-old debate: grill or pan-sear? Each method has its merits, and the choice ultimately depends on your preference and available equipment. Let’s break down the options:
Grilling
Grilling is perhaps the most iconic method for cooking steak. The charred flavor imparted by the grill is unbeatable, and there’s something primal about cooking over an open flame. Here’s how to do it:
- Preheat your grill to high heat.
- Oil the grates to prevent sticking.
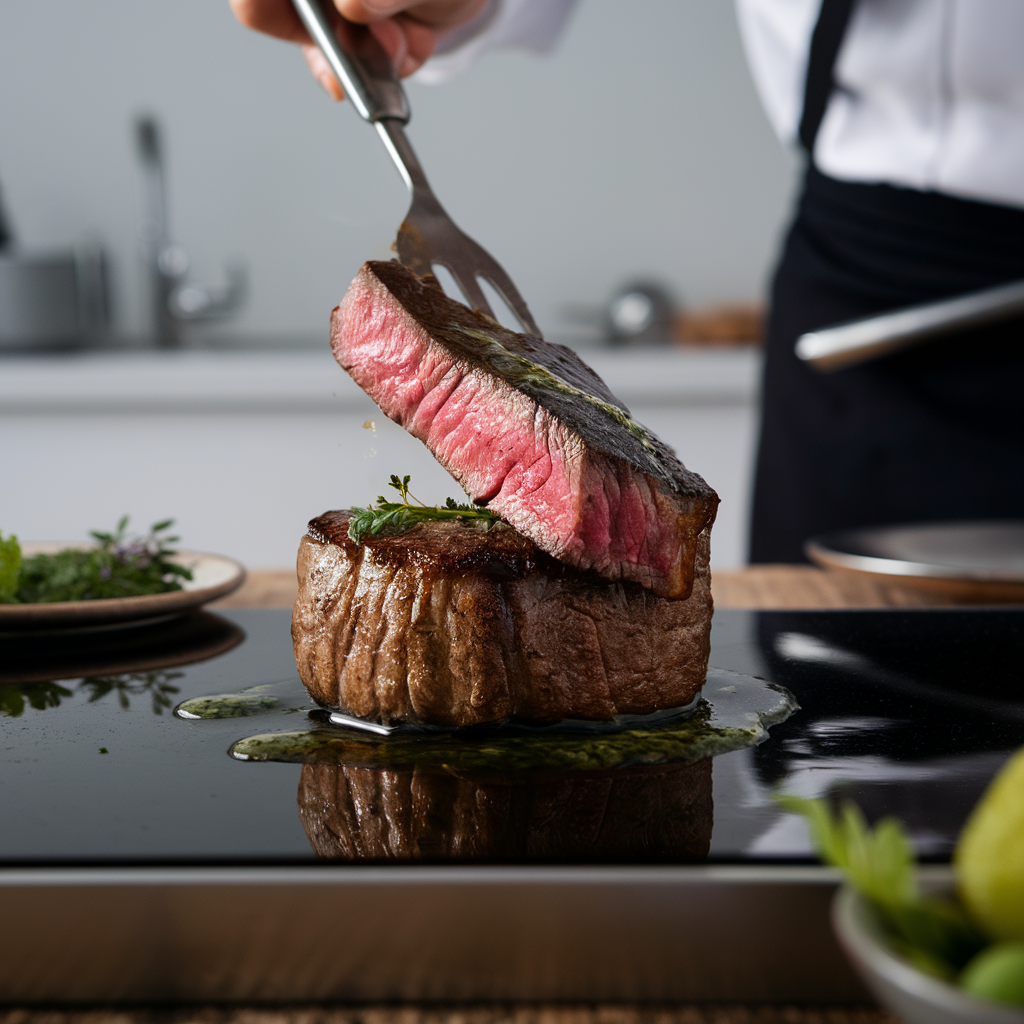
- Place the steak on the grill and let it sear without moving it for 3-4 minutes. This is crucial for creating those beautiful grill marks.
- Flip the steak and continue cooking for another 3-4 minutes for medium-rare, adjusting time based on thickness and desired doneness.
Grilling can be a bit of an art form. I once grilled a steak for a group of friends that turned out perfectly—crusty on the outside, juicy on the inside. The cheers I received that day were like a standing ovation at a Broadway show. (Okay, maybe that’s a slight exaggeration, but you get the idea.)
Pan-Searing
For those without a grill or on a rainy day, pan-searing is an excellent alternative. Here’s how to get that restaurant-quality sear:
- Heat a heavy skillet (cast iron is ideal) over medium-high heat until it’s smoking.
- Add a couple of tablespoons of oil and swirl to coat the pan.
- Carefully place the steak in the skillet and let it sear without moving it for about 3-4 minutes.
- Flip the steak and add a knob of butter, alongside any herbs you wish to use (rosemary or thyme are great). Use a spoon to baste the steak with the melted butter for extra flavor.
Pan-searing gives you a perfect crust and allows for better control over the cooking process. I remember when I first tried this method; the sound of the steak hitting the pan was music to my ears. It was like a symphony of sizzling and popping. If you haven’t tried it yet, do yourself a favor and give it a go!
Broiling
Broiling is another viable option, especially for those who want to replicate grilling indoors. It involves cooking the steak under high heat in your oven:
- Preheat your broiler and place your oven rack about 6 inches from the heat source.
- Place the steak on a broiler pan and slide it into the oven.
- Broil for about 4-5 minutes on each side, depending on thickness and desired doneness.
Broiling can be a bit tricky, as ovens can vary greatly in their heat distribution. I learned this the hard way when I nearly set off the smoke alarm with one particularly enthusiastic broil session. It was an adventure, to say the least! But once you get the hang of it, broiling can yield delicious results.
Understanding Doneness: How to Get It Just Right
Now, let’s talk about doneness—an area where many falter. It’s crucial to understand the different levels of doneness so you can cook your steak exactly how you prefer it:
- Rare: 120°F (50°C) – cool red center
- Medium Rare: 130°F (54°C) – warm red center (often regarded as the ideal doneness)
- Medium: 140°F (60°C) – warm pink center
- Medium Well: 150°F (66°C) – slightly pink center
- Well Done: 160°F (71°C) and above – little to no pink (but, let’s be honest, why would you want that?)
The best way to check for doneness is to use an instant-read thermometer. I can’t stress this enough—don’t rely solely on time! It varies based on thickness, starting temperature, and cooking method. Plus, I’ve seen too many folks cut into their steaks only to guess wrong on doneness, resulting in disappointment. (Don’t be that person.)
Resting: The Final Touch
After you’ve cooked the steak to perfection, resist the urge to dive in immediately. This is where many amateur cooks go wrong. Resting is essential. When meat cooks, the juices migrate towards the center. If you cut into it right away, you’ll lose all that delicious flavor.
Let your steak rest for at least 5-10 minutes, loosely covered with foil. This allows the juices to redistribute, resulting in a juicier and more flavorful steak. I often use this time to prepare a quick side dish or pour myself a glass of wine (or both!).
Serving Suggestions
Once the steak has rested, it’s time to serve! You can keep it simple by slicing it against the grain and plating it next to your favorite sides. Classic accompaniments include:
- Garlic mashed potatoes
- Grilled vegetables
- Simple green salad with vinaigrette
- Crusty bread to soak up those juices
But don’t be afraid to get creative! I once served a steak with a chimichurri sauce that had my guests raving for days. The bright, herby flavor cut through the richness of the meat, creating a perfect balance. Experimenting with different flavors can elevate your steak night from ordinary to extraordinary.
Common Mistakes to Avoid
Even the most seasoned cooks can make mistakes in the kitchen. Here are a few common pitfalls to watch out for when preparing your steak:
- Skipping the Seasoning: A well-seasoned steak is a happy steak. Don’t skimp on the salt and pepper!
- Not Letting it Rest: As mentioned before, resting is crucial. Don’t rush this step.
- Using the Wrong Tools: Invest in a good meat thermometer and a sturdy pair of tongs. These tools can make a world of difference.
- Overcooking: Nobody wants a shoe-leather steak. Keep an eye on the temperature!
Learning from mistakes is part of the culinary journey. I still remember the first steak I overcooked—my friends bravely chewed through it, but I could tell they were secretly plotting my demise in the kitchen. It’s experiences like these that teach you the importance of attention to detail and practice.
Conclusion: Your Journey to Steak Mastery
There you have it—a comprehensive guide to mastering the perfect steak with simple ingredients. With a little care, attention, and practice, you can create a steak that will impress family and friends alike. Remember, cooking is as much about the experience as it is about the food. So, don’t forget to enjoy the process, have fun, and embrace the occasional mishap. After all, it’s those moments that often lead to the best stories.
So fire up the grill or heat that skillet, season your steak generously, and get ready to savor each mouthful of your culinary creation. Happy cooking!
- 0
- By